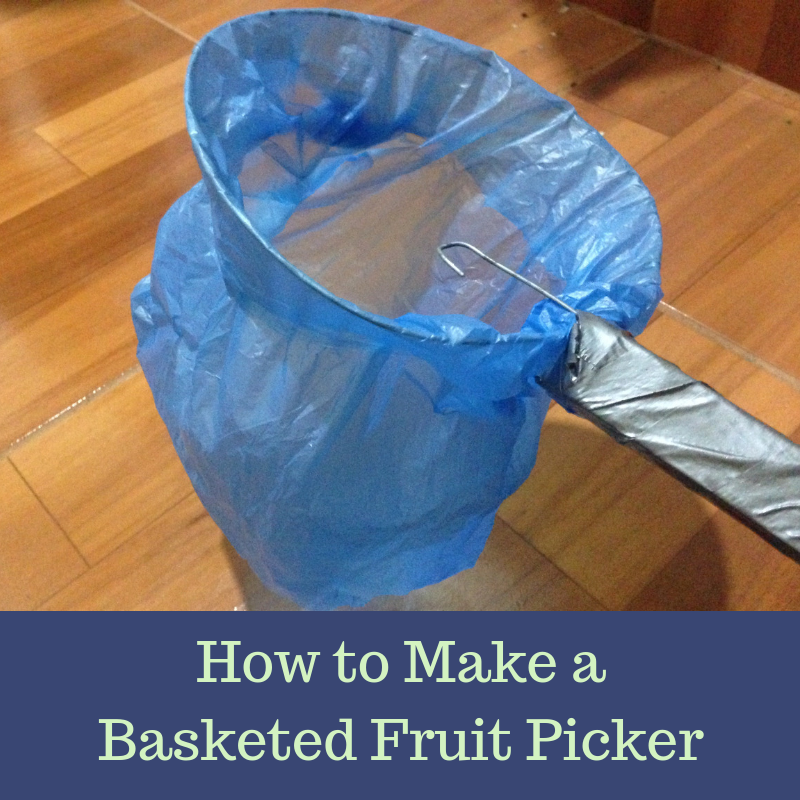
Easy DIY Basketed Fruit Picker for Harvesting and Foraging
Having a fruit tree is a great source of free food while it’s in season, but only if you can actually get the fruit down!
That’s the problem I ran into when the avocado tree on the property went into full production mode. There were tons of beautiful, healthy, and delicious avocados just ready to be eaten, but the majority of the fruit was above the first story.
By the time they fell on their own, they were ripe, soft, and would burst open on the pavement. After attempting to salvage a couple of smashed fruits, I decided I needed a better solution.
So, I made a fruit picker. And, much to my surprise and delight, it worked! I’ll be making some changes to it in the future, but it more than served its purpose and we were soon overwhelmed with avocados.
But, as it turns out, you can make quite a few things with avocado, so we were able to use most of them and give away the rest.
The best part about this fruit picker is that it was totally free! I made it with things we already had lying around, so it didn’t cost a thing, and took less than an hour to make, including some trial and error.
Now, without further ado, the directions on making a DIY fruit picker.
Step 1: Gather Your Supplies
For this project, all you need are:
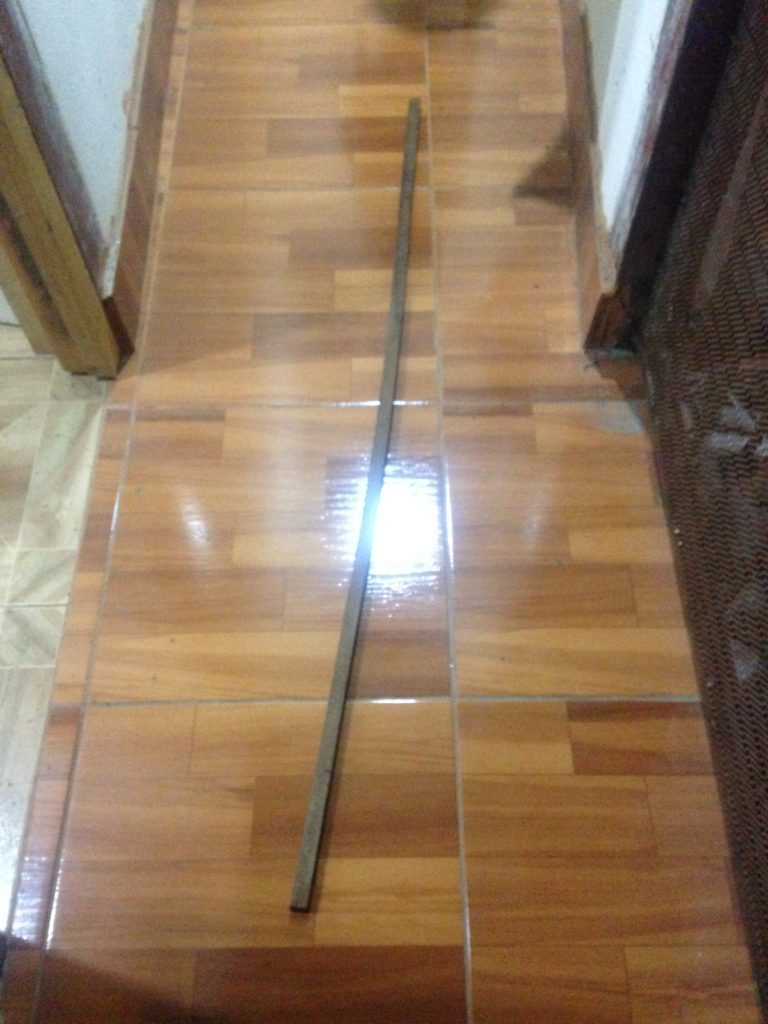
- A long, sturdy, lightweight stick (metal or heavy plastic tubing would also work)
- Heavy wire (a coat hanger would be perfect for this)
- Duct tape
- A small plastic bag or any lightweight material
As far as tools go, the only things you may need are:
- Saw to trim stick to size (if necessary)
- Wire cutters
- Pliers
Step 2: Prep the Wood
If the stick you use is already the size you want it to be, then you can skip this step and move onto the next one. Personally, I didn’t cut my stick and honestly wish it were even longer, so I don’t recommend cutting down your stick.
As you’re using it, if you find it is too long, then you can always trim some off later. However, it’s a lot harder to add length onto it if you find it’s too short.
My prepping the wood part of the project actually involved using wood glue to fix a large crack in the wood. So far, it’s held well despite it being a massive crack.
Step 3: Create the Loop and Hook
The next thing you need to do is get the loop and hook into shape. The size of these is totally up to you and what size fruit you’re planning on picking with your fruit picker, so I won’t give any measurements for how much wire to cut.
I believe I used about 3 feet of wire to get a nice big shape and still had more than enough leftover for the anchor.
The loop needs to be big enough for the entire fruit to easily fit into. The smaller you can make it, the better. Bigger loops mean more things to get caught on leaves and branches. On the other hand, if it’s too small you won’t be able to get the fruit in at all!
The hook should reflect the size of the stem. Since I was doing this for avocados, I made a larger hook than I would if I were wanting to use it for apples or pears. For smaller fruit, you may even want to give it a bend rather than a rounded hook.
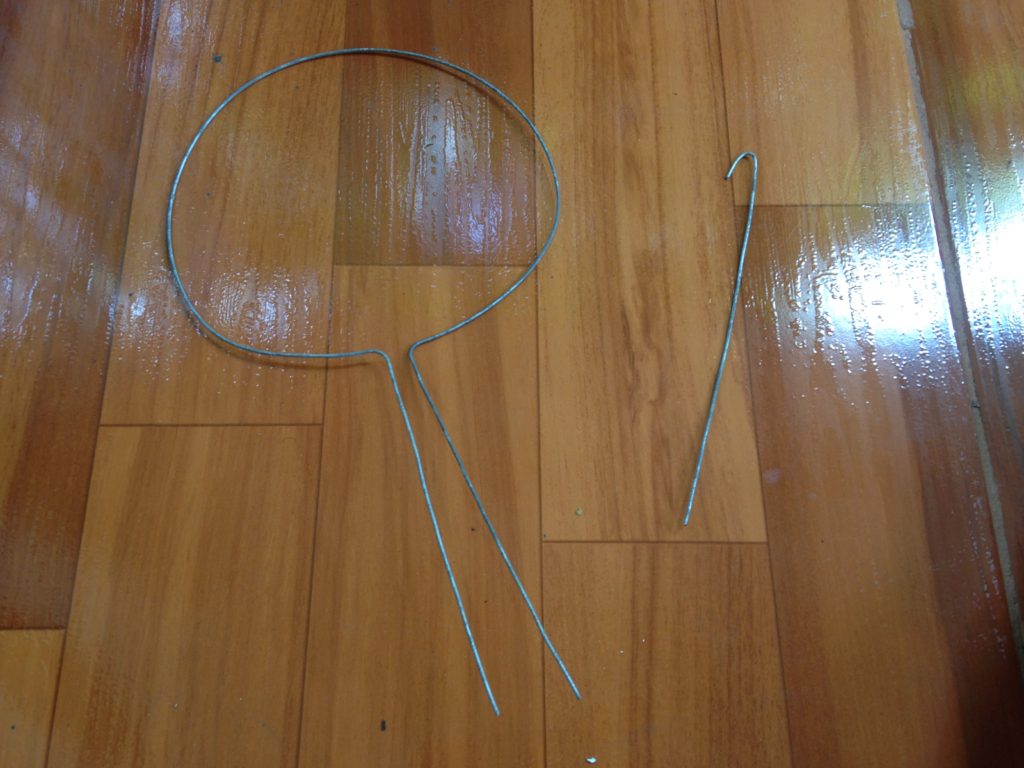
As you can see, I once again included a long “tail” to anchor this piece to the rest of the picker.
If you use a coathanger for this project, you’ll want to shape the exising hook, then bend the rest of the hanger into a circle with the hook at the bottom.
Since the wire I used for my project is a bit weak for heavy avocados, I’m hoping to re-do my fruit picker with a wire coathanger!
Step 4: Put it All Together
Now, the fun part: assembly.
Simply place the anchor parts of the loop and hook on one end of the stick. The hook should go in the middle of the two loop anchors.
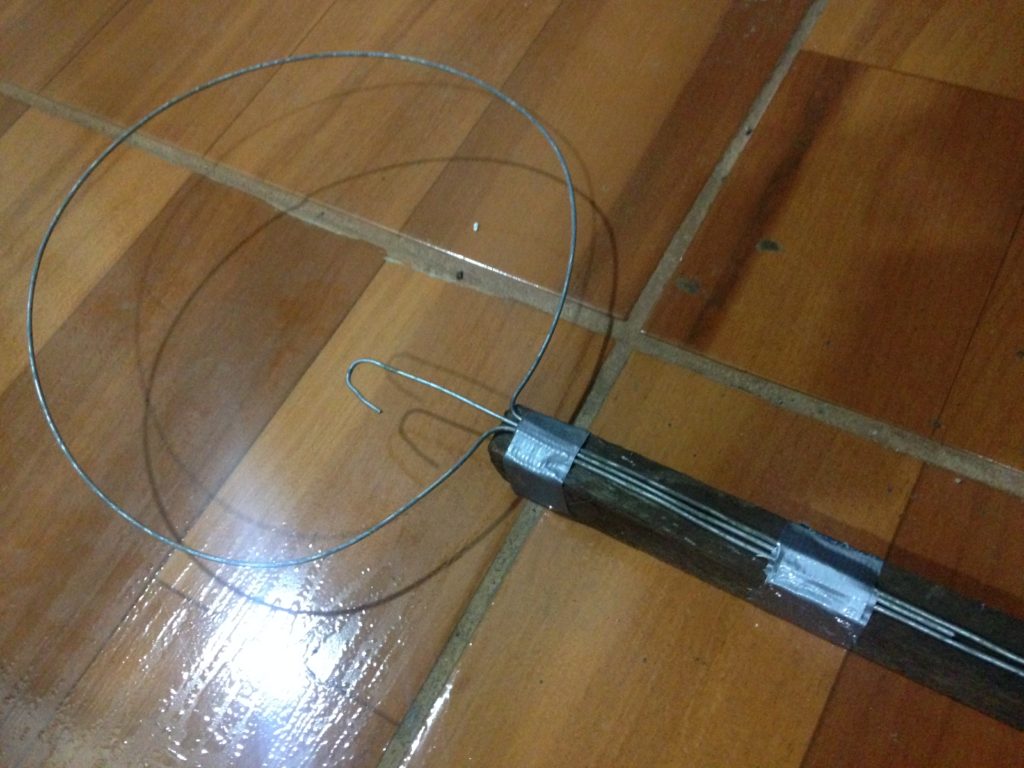
First, I used a couple of small pieces to hold everything in place while I got it all together. I later realized I needed to anchor the hook better, so I had to go back and make this adjustment.
At this point, you’ll want to bend the end of the hook over the duct tape. This keeps it in place while you’re pulling on a fruit so it doesn’t slide right out.
Next, get a strip of duct tape about 6 inches longer than the anchor parts of the wire. Split the top 6 inches and go back and forth and around the top of the hook with those. The rest of that piece can lay along the length of the wire.
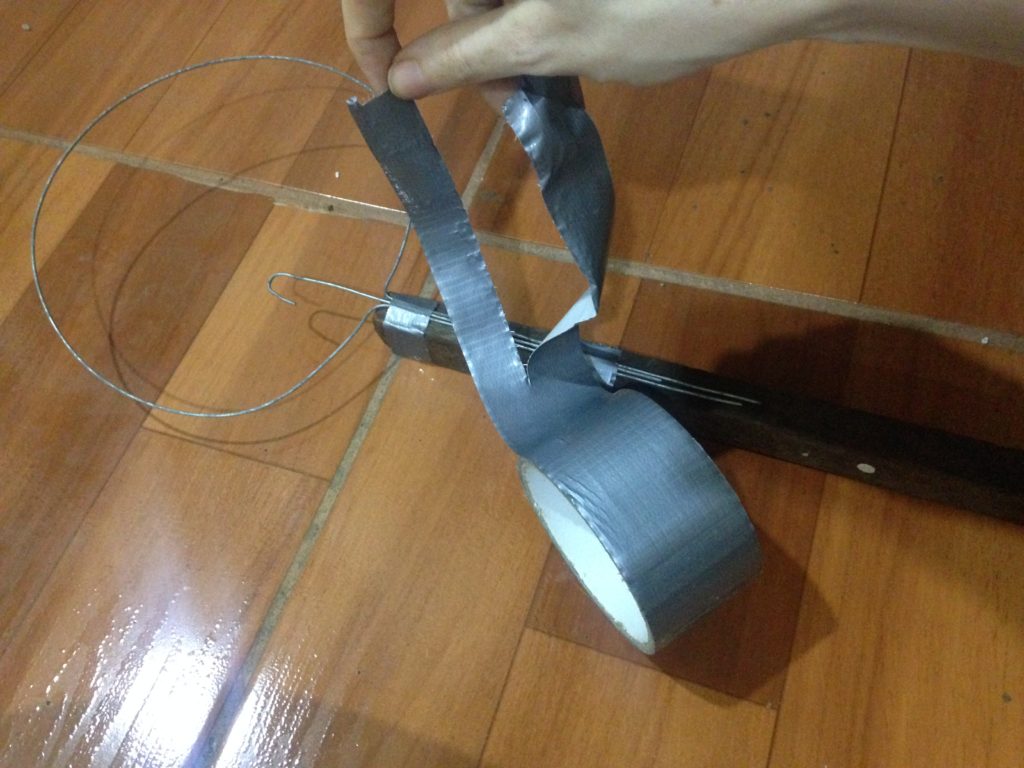
Then, all that’s left is to get a long piece of duct tape and wrap it tightly, firmly attaching the wire to the stick.
Once that’s done, you just need to add the plastic bag to catch the fruit in. I did this by cutting the handles open. I tied one side around the hook where it meets the stick.
The rest of the opening of the bag gets pulled over the wire just like you’re lining a trash can. Then, I tied the other handle on the other side to pull it tight enough that it wouldn’t fall off without being so tight it didn’t allow anything to fall into it.
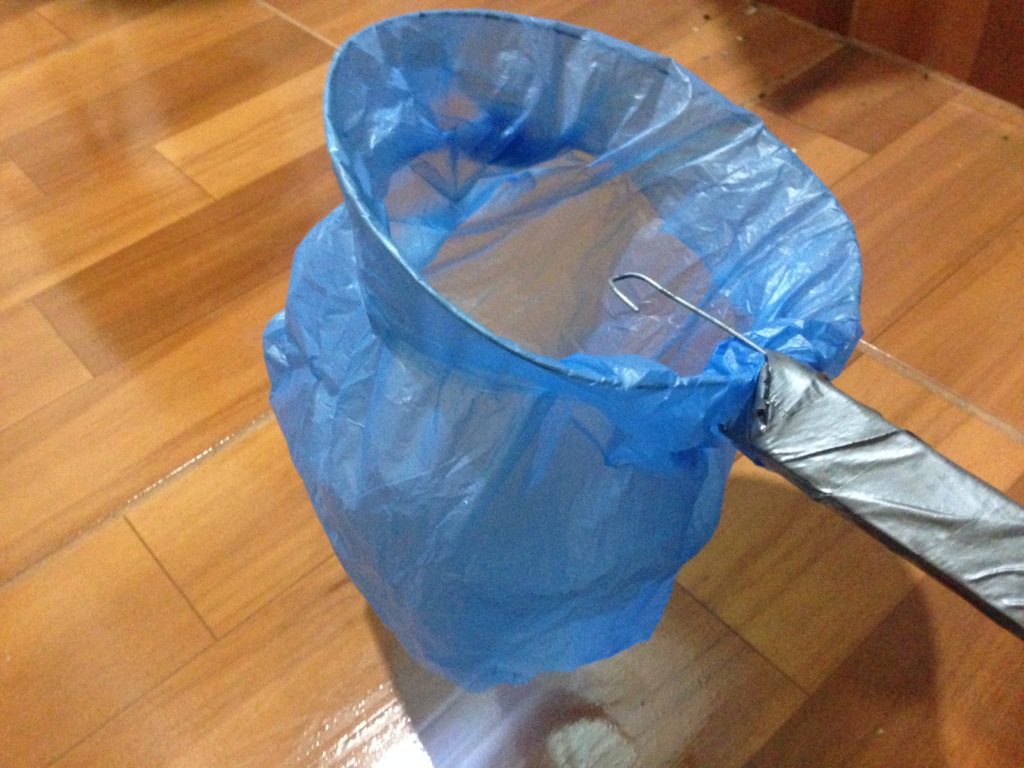
This is a part of the process that I would like to improve on. While the plastic bag has held up so far, I’m trying to reduce my environmental impact which includes cutting down on plastic usage in general.
That being said, I’m hoping to use an old t-shirt to create a new basket for my fruit picker. With that, I’ll simply sew a circular-shaped piece of fabric around the edges.
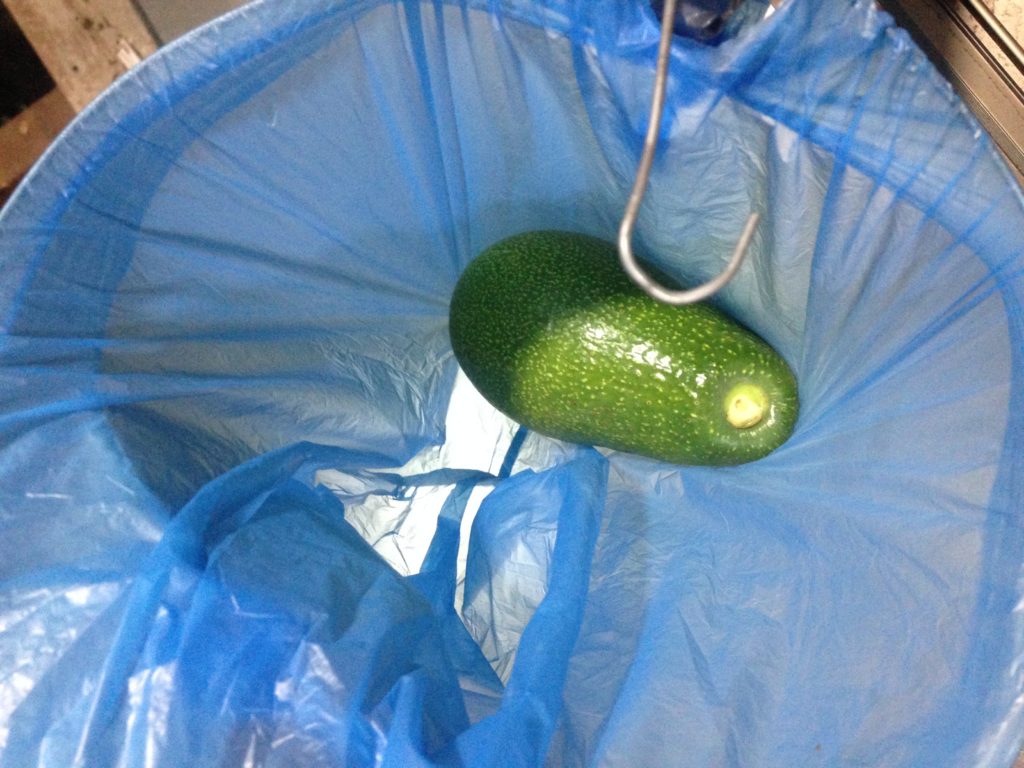
And that’s it! I got 4 avocados off the tree that night by reaching out our bedroom window, and another 10 the next day!
More recently, I also pulled 4 from the tree from our balcony and got a dozen or so by climbing onto the roof of my in-laws’ house.
Want a Downloadable Version?
I’m so excited for everything that this simple, free, and easy DIY project has already done for my family, and will continue to do as we find more fruit trees to forage from!
If you want a downloadable version of this DIY project so you can print it can carry it with you while you work, you can find one in our VIP resource section.
If you don’t already have access, you can get it by hitting the button below. If you have previously signed up, this will take you right to our VIP section.

